Monthly Archives: March 2012

Vegan Maple Molasses Oatmeal Boule

I think that name alone is enough to get my mouth watering.  I love this bread, slightly sweet and very delicious.  Wednesdays are crazy busy days for us, so I always put soup to cook in the crockpot all day while we are working and of course with a good soup you need a good bread.  I had been stopping by Whole Foods on my way home to pick up a boule there and then thought, why don’t I just make my own.  So I found this recipe like I said, I LOVE it.

 
maple molasses oatmeal boule
makes 2 boules
 
you will need:
  • 5 tsp dry active yeast
  • 2 cups warm water
  • 1/3 cup molasses
  • 1/2 cup pure maple syrup
  • 1 tbsp kosher salt
  • 1 cup multi grain oats – finely ground
  • 5 – 6 1/2 cups all purpose flour
  • 1 tsp canola oil for greasing the bowl
assembly:
  • in a large mixing bowl add yeast and warm water. allow to sit for about 5 minutes until the yeast begins to bubble
  • add to the yeast mixture maple syrup, molasses & salt- stir until well combined
  • with a wooden spoon stir in ground oats and 4 cups of flour – do not over mix/mix with a hard hand. dough will be very tacky/moist
  • on a well floured surface turn dough out, knead in remaining flour 1/2 cup or so at a time using enough to keep the dough from sticking to your hands and work surface.
  • knead dough until smooth and elasticity – about 8-10 minutes
  • in a well oiled bowl place dough, cover with plastic wrap and allow to rise in a warm spot until double in size – approximately 1 -1 1/2 hours
  • once double in size – lightly punch down dough and turn onto a very lightly floured work surface – divide dough into 2 equal portions
  • shape dough into (2)round loaves – place dough rounds on a parchment lined baking sheet, cover and let rise until double in size – about 40 minutes
  • preheat oven to 425* – place a cookie sheet on the lowest rack
  • once the bread has completed its second rise and the oven is preheated – dust each loaf with flour – using a serrated knife slice 3 lines into the top of each round
  • bake the bread on the middle rack of the oven – pour 1 cup of hot water into the second baking sheet that was placed in the oven during preheating (this will create steam so be careful)
  • bake for about 20 – 25 minutes or until the crust is brown and when the bottom of the loaf is tapped it sounds hollow
  • remove bread and allow to cool for about 10 minutes prior to enjoying!

Vegan Whole Wheat Bread

image

J suddenly declared that he was sick of processed bread and informed me he bought me some loaf pans. I only eat Dave’s Killer Bread or Ezekial Bread but J can’t bring himself to spend that much for bread. I, myself, love home cooked foods, they are healthier for us and we can control the ingredients. So I found this recipe and love it. It is so simple and the beauty of it and the few ingredients it has is you can add whatever you want to it to change it up. It calls for 5 cups of whole wheat flour. I have been using 4 cups of whole wheat flour and 1 cup quinoa flour to add protein to this bread. You can also use gluten free all purpose flour or add oats, millet, whatever you want to increase the nutritional benefits of this bread.

Vegan Whole Wheat Bread

5 cups whole wheat flour
4 tsp dry yeast
pinch of salt (about 0.25 to 0.5 tsp)
1 Tbsp of oatmeal
2 and 2/3 cups of warm water
0.25 cup of molasses

Preheat your oven to 400. To get the water up to temperature test it on the inside of your wrist. If it feels warm but not hot it’s good to go. Warm water helps to activate the yeast and get it going. Hot water will kill our yeasty friends.

And yes, yeast is vegan!

Combine 1 and 1/3 of the warm water with the molasses and then add in the yeast and set it aside for around 10 minutes. Make sure that the yeast is full dissolved in the molasses water when you’re ready to pour it into the flour.

In a separate big bowl combine the flour and salt. Keep the oatmeal aside for later. Add the yeast and the rest of the warm water (1 and 1/3 cup) and stir until combined but don’t over mix. Dough should be stick at this point like a batter. Add a bit more warm water if needs be.

Pour dough into loaf pan and smooth with a wet spatula. Carelessly toss the oatmeal on the top of the dough.

Allow dough to rise in the pan until it breaches the top. I put mine in the microwave to rise. It is a dark and keeps the bread warm. Now put in the oven to bake for around 30 to 40 minutes. Bread is ready when a thin knife or long toothpick stuck into its middle comes out clean.

Take out of oven let it rest for 5 to 10 minutes on a wire rack in the loaf pan and then turn it out so its naked self can cool on the wire rack for a further 10 to 15 minutes. Now you can slice it up and eat it with abandon. Please leave some for others!

My original recipe

image

Here it is….. My original recipe. I am calling it Peanutty Edamame Stir Fry. J and I just had a plate and it is delicious. I am going to keep the recipe under wraps until it goes live on Tosca’s blog. Keep an eye out for it.

The Eat Clean Diet Blog

Earth Friendly Sara will be a guest blogger on The Eat Clean Diet in the month of April.  I will post a link when the blog goes live.  I will be detailing my story as a vegan as it relates to The Eat Clean Diet.  For those of you who are unfamiliar with The Eat Clean Diet, it promotes healthy whole foods, nothing refined or processed.  If you know anything about the way I have been eating for the last several months, I eat vegan whole foods.  I stay away from anything process or refined.  Meaning I cook my foods from their original form.  Yes, this does take a little extra time, for example, washing, cutting and boiling potatoes instead of heating up processed flakes.  I have found that eating whole foods is the best way to get the nutrients and vitamins our bodies need, as well as keeping the chemicals and toxins that they put in processed foods out of our bodies.  I can give honest testimony as to how healthy and strong I feel and look.  I have never felt better in my entire life and to date I have lost 98 pounds. I will save some of this for my blog but I wanted to share some of the info.

I will also be creating my own recipe.  I love asian foods, I love edamame and I love stir fry…. so my plan is combine the three into a delicious dish.  I will share some of the process of creating my own recipe and post the link when the recipe goes live on the blog.


Pumpkin Sage Pasta

image

I got this recipe for Pumpkin Sage Pasta from Everyday Happy Herbivore. It is savory and delicious. Of course I love everything pumpkin.
Added some Asian style veggies with an my favorite Asian sauce on the side.

Meatless ball subs

image

Made with Gimme Lean, J says he loves these even more than actual meatballs!

Looking for vegan Ranch Dip?

image

I ordered a spice packet from Vegan Machine, on etsy. Followed the directions, veganaise, bit of apple cider vinegar and the spice packet. Put it in the fridge for at least an hour. I made mine up this morning and let it sit in the fridge all day.
This dip is so good J and I could not stop eating it. It was supposed to be a side dish with baked wheat pitas for dinner tonight but we ended up eating it as an appetizer while dinner was cooking.
I got more spice packets for vegan cheese balls. I am going to make them for Easter. I hope they are as amazing as this dip!

Cajun Black Eyed Pea Cakes

image

Cajun black eyed pea cakes with creamy Cajun mustard and teriyaki rice, both from Everyday Happy Herbivore Cookbook served with green peas. Spicy, flavorful and delicious.

Pasta Alla Jason

image

So I named this dish after J because he was crying that he was hungry and wanted me to cook him dinner. I budget all our meals and I do not budget for weekends, we just eat left overs or snack on fruits and veggies but that wasn’t doing it for him tonight.

Pasta Alla Jason
6 oz of quinoa elbow pasta
6 oz frozen organic Santa Fe Vegetables
1/2 cup almond milk
3 T corn starch
1/4 cup nutritional yeast
2 T agave nectar
Salt and pepper to taste

Boil pasta, in another pan add milk, corn starch, agave, nutritional yeast, salt and pepper in a pan. Heat until sause starts to thicken. Cook until you get desired thickness. When pasta is nearly cooked, add frozen veggies. Boil until cooked.
Strain, add sauce and serve immediately.

Unmolding and cutting soap

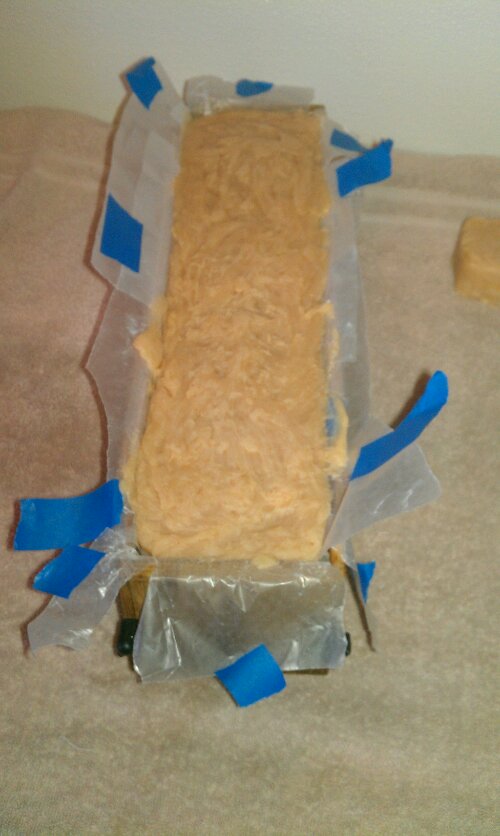
Continuing from yesterday’s post, once the soap sets up in its mold for 24 hours, it can be removed and cut into bars. I line my molds with wax paper which makes it very easy to remove the soap from the mold.

image

I use the wax paper as handles and simply pull the soap out of the mold.

image

Then I peel the wax paper off the uncut soap. It is now ready to be cut into bars.

image

I place the soap back in its mold. J built me this mold box. It has as openings on both sides that allows me to cut the soap any width I desire. I push the blade down into the openings, remove the bar and push the rest of the soap forward until I have it completely cut. One batch makes 15 to 20 bars depending on the thickness.

image

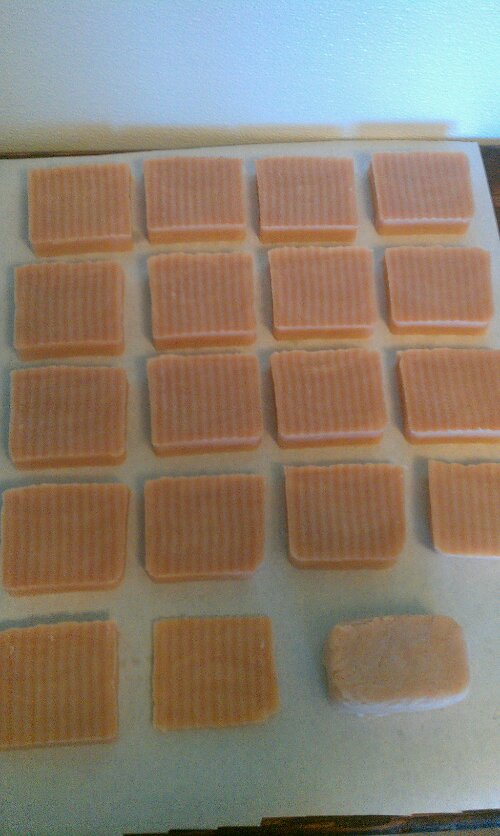
Then they lie flat on wax paper for one week on each side. At this point I label them and they are ready to be sold.
I LOVE the color of this batch. I was right that it is not the pink I want, but this color is perfect for the scent, grapefruit. And the smell is heavenly. This batch will make a great addition in my shop.